AI Trader Setup
AI Trader is the core component of Hyper Alpha Arena, responsible for executing trading decisions based on strategy prompts. This section will guide you through creating and configuring AI Traders.
Creating AI Trader
Method 1: Using Paid API (Recommended for Live Trading)
Using Deepseek as an example:
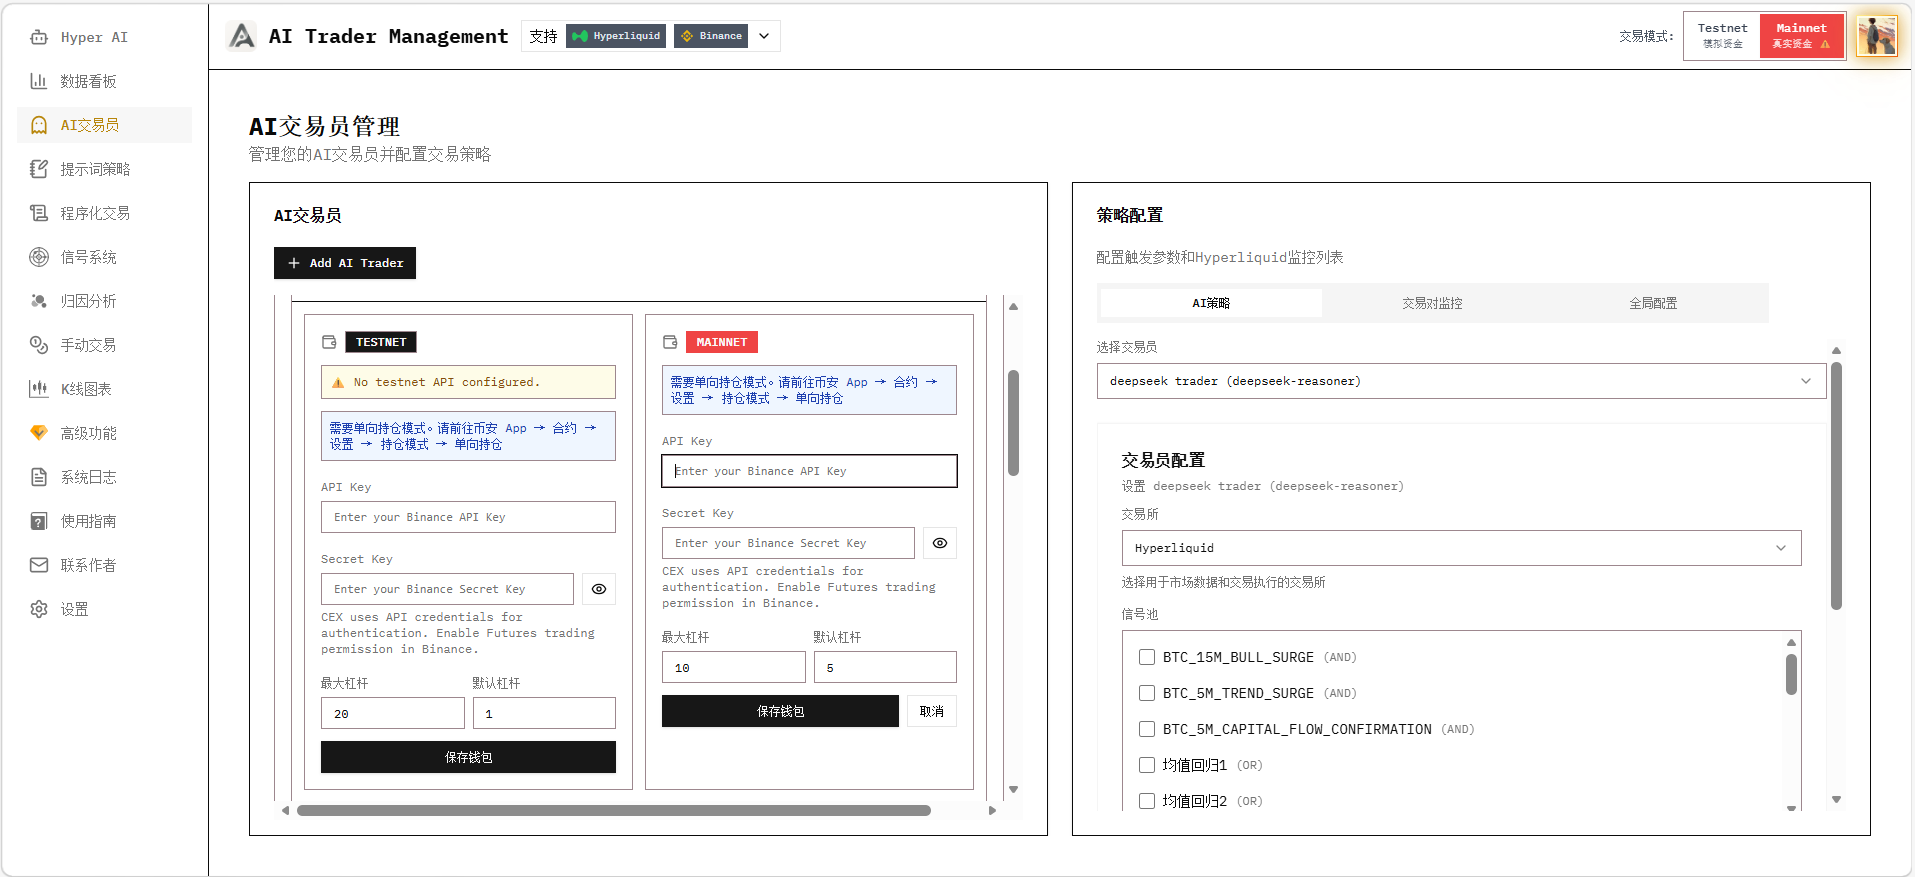
Step 1: Access AI Trader Interface
Click AI Trader in the navigation bar, then select Add AI Trader.
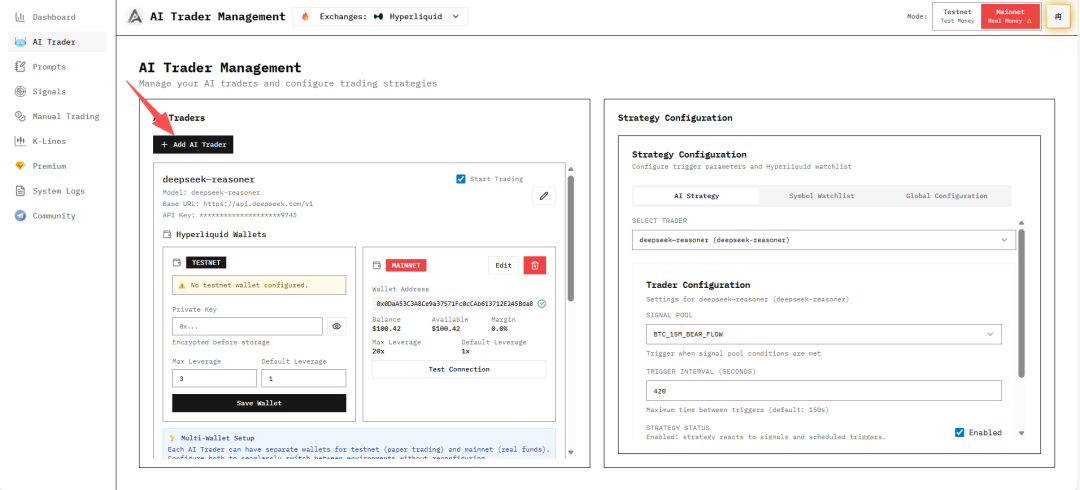
Step 2: Configure API Information
Trader Name: Enter a descriptive name, e.g.,
Deepseek-reasonerBASE URL: Visit Deepseek API Documentation, copy the base_url and fill it in
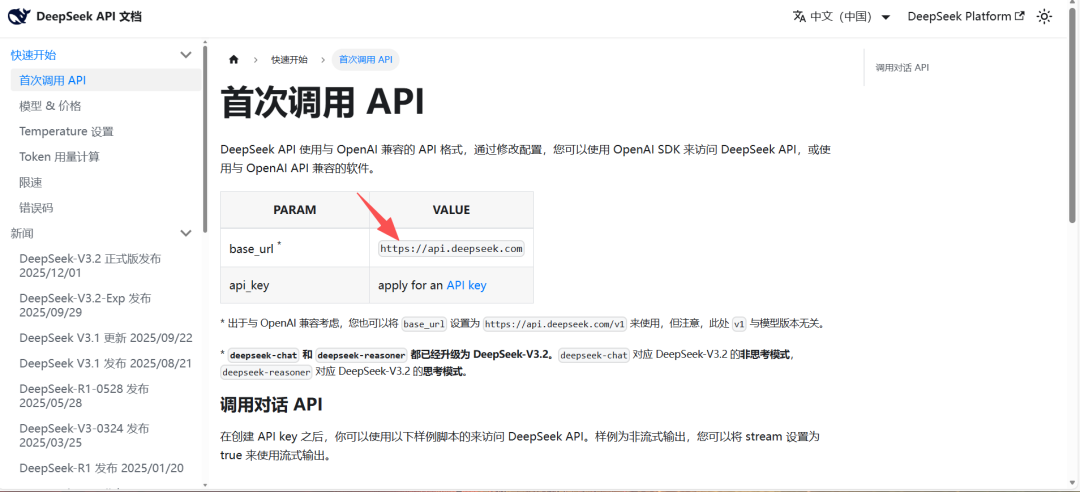
API Key: Apply for and save an API Key from the Deepseek platform

Model: Select the model name
deepseek-chat: Non-reasoning modeldeepseek-reasoner: Reasoning model (recommended)
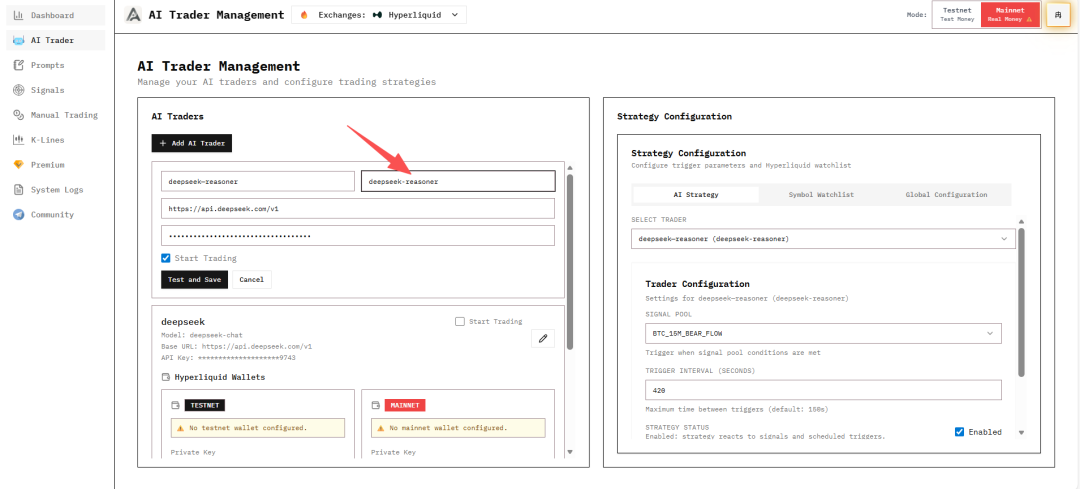
Step 3: Test and Save
After filling in the information, click Test and Save to confirm the connection is successful.
Note
Deepseek API requires recharge to use. If you're just testing, you can use Method 2's free quota.
Method 2: Using Free Quota (Suitable for Testing)
Using Alibaba Cloud Bailian platform's free model quota:
Step 1: Select Model
Visit Alibaba Cloud Bailian Model Market and select a model.
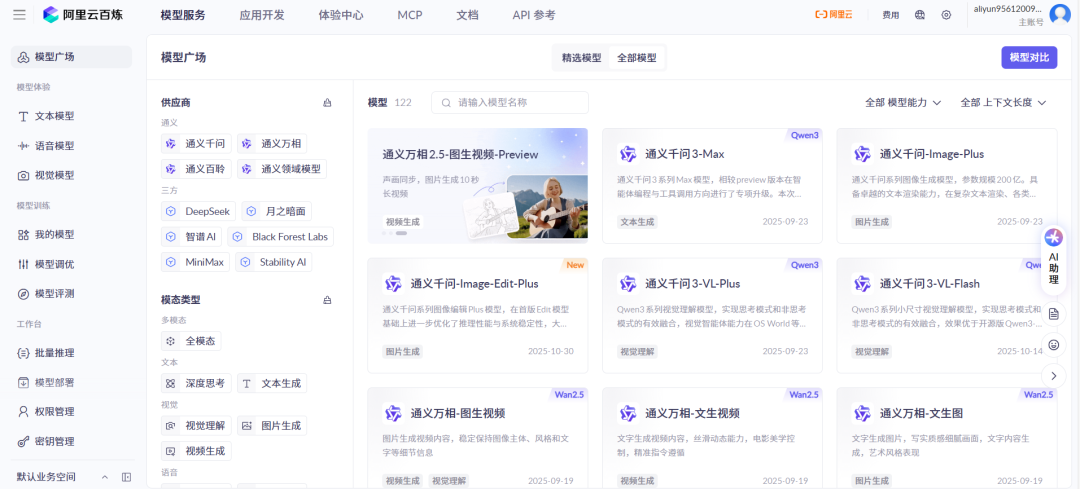
Step 2: Get Model Information
Click to enter the model details page, enable free quota, and copy the model Code to fill in the Model field.

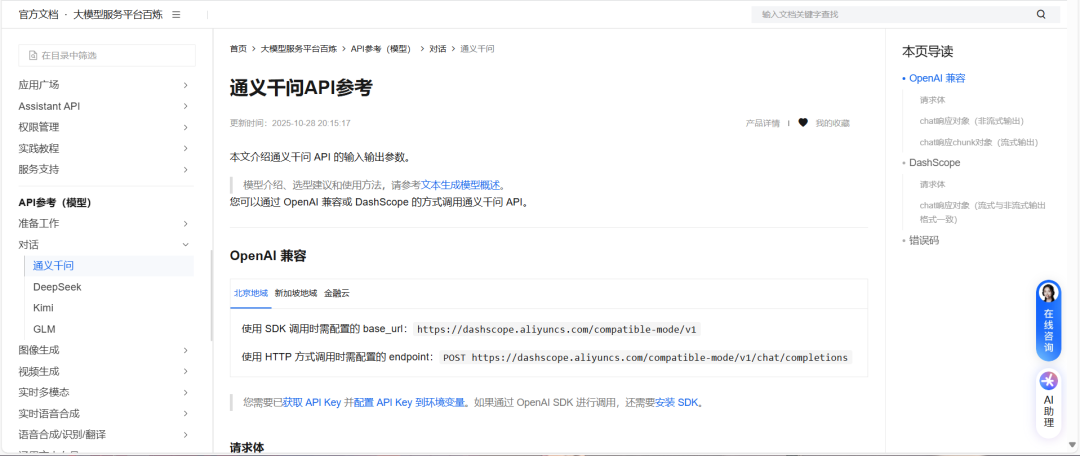
Step 3: Configure BASE URL
Qwen's BASE URL:
https://dashscope.aliyuncs.com/compatible-mode/v1Refer to Qwen API Documentation
Step 4: Get API Key
Visit API Key Management Page, apply for and copy the API Key.

After filling in, click Test and Save.
Note
AI Traders created with Method 2 have limited quota and only support testing, not recommended for live trading.
Setting Trigger Parameters
After creating an AI Trader, you need to configure trigger parameters to control strategy execution.

Trigger Mode
- Signal Pool: Triggered based on user-created signal pools when conditions are met
- Trigger Interval: Set the time interval (seconds) for strategy triggers
Strategy Status
- Strategy Status: After checking Enabled, the AI Trader will respond to signals and scheduled triggers
Save Configuration
After setup, click Save Trader Config to save the current AI trader's strategy configuration.
Global Configuration
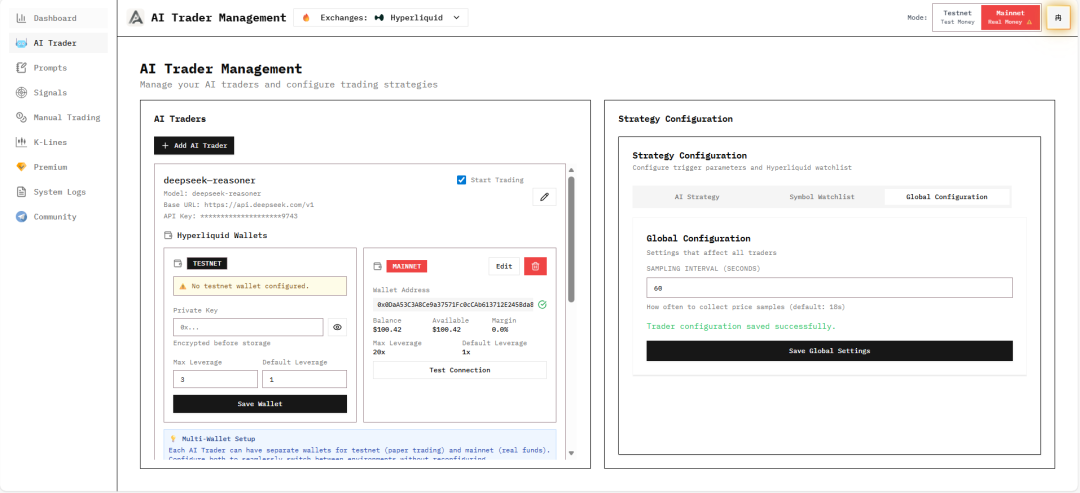
Sampling Interval
Sampling Interval: Controls how often market price data is collected.
After modification, click Save Global Settings to save the global configuration.
Symbol Configuration

The system supports custom configuration of trading symbols on supported exchanges (Hyperliquid and Binance Futures) to monitor real-time market status and model decision performance for different assets.
Connecting Exchange Account
To execute trades, you must connect an exchange account. The platform supports two exchanges:
Option A: Hyperliquid Wallet
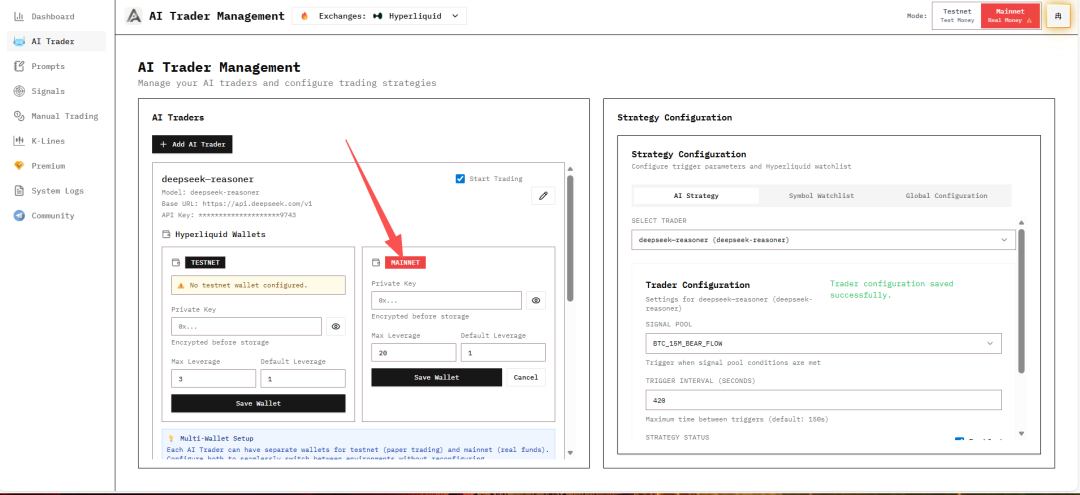
Configuration Steps:
- Select a created AI Trader
- Enter the Hyperliquid wallet's Private Key
- Configure Maximum Leverage and Default Leverage
- Click Save Wallet to connect
- Success notification will appear in the top right corner
Exporting Private Key (Email Login Users)
If you log in to Hyperliquid using email, you need to export the wallet private key first:
Step 1: Click settings in the top right corner of Hyperliquid and find the export wallet option.
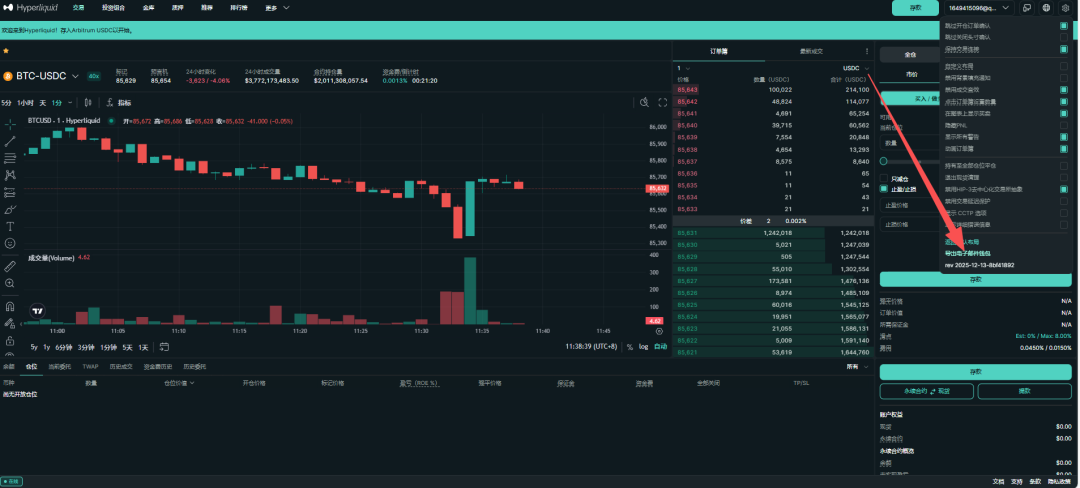
Step 2: Click Copy key to copy the Private Key.
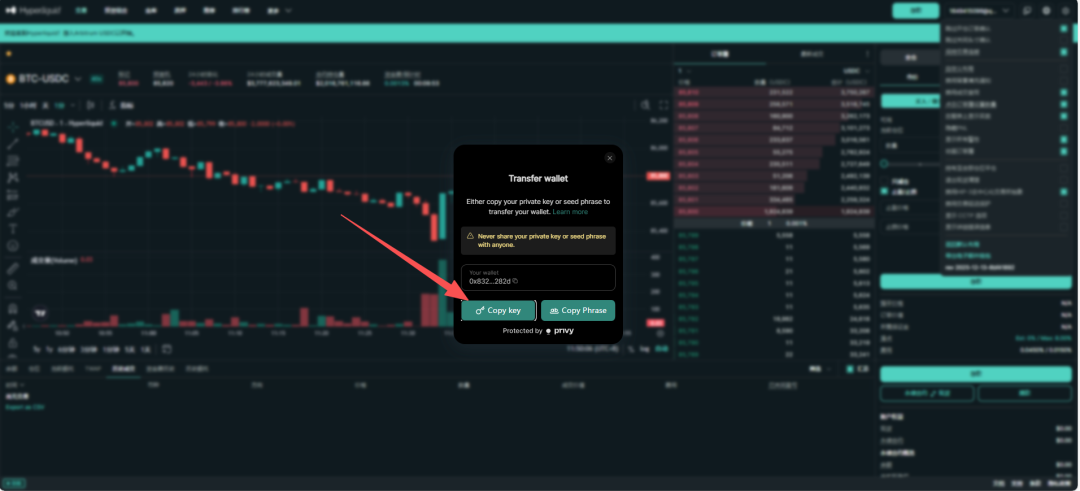
Step 3: After pasting the private key, add the 0x prefix (digit 0 and lowercase letter x) at the beginning.

Security Warning
The private key is your wallet credential. Never share it with others. It's recommended to test on testnet first and only use mainnet wallet after confirming everything works correctly.
Option B: Binance Futures API
Step 1: Register and Create API Key
- Register at Binance and complete KYC verification
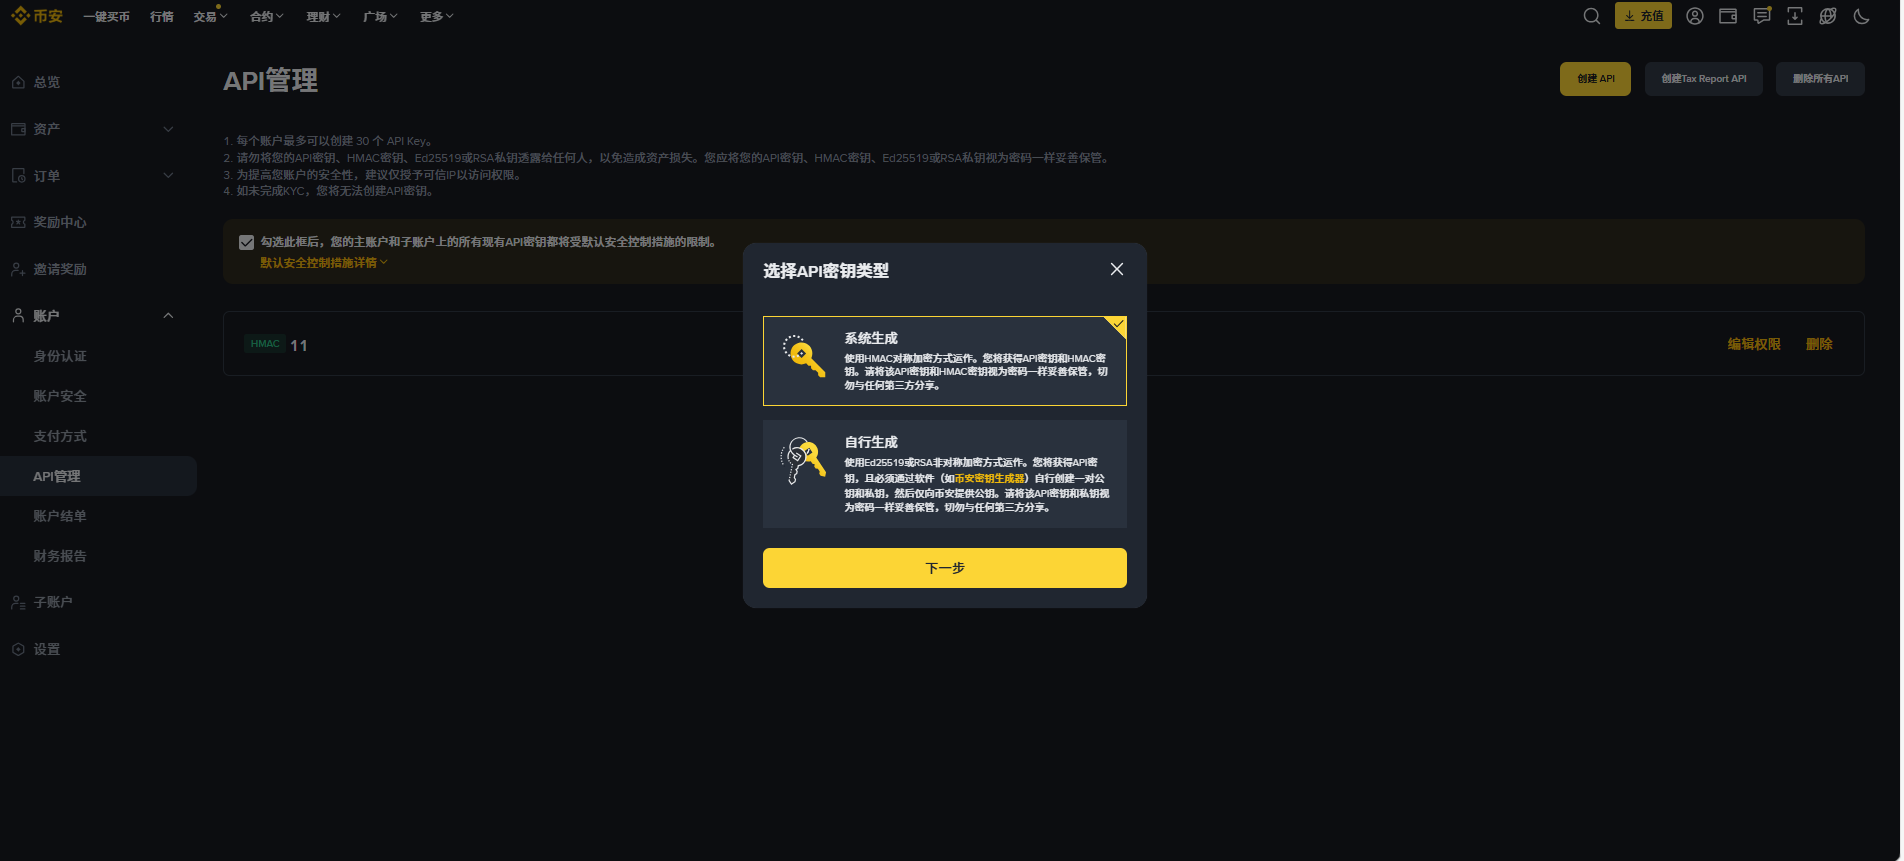
- Go to API Management to create an API key
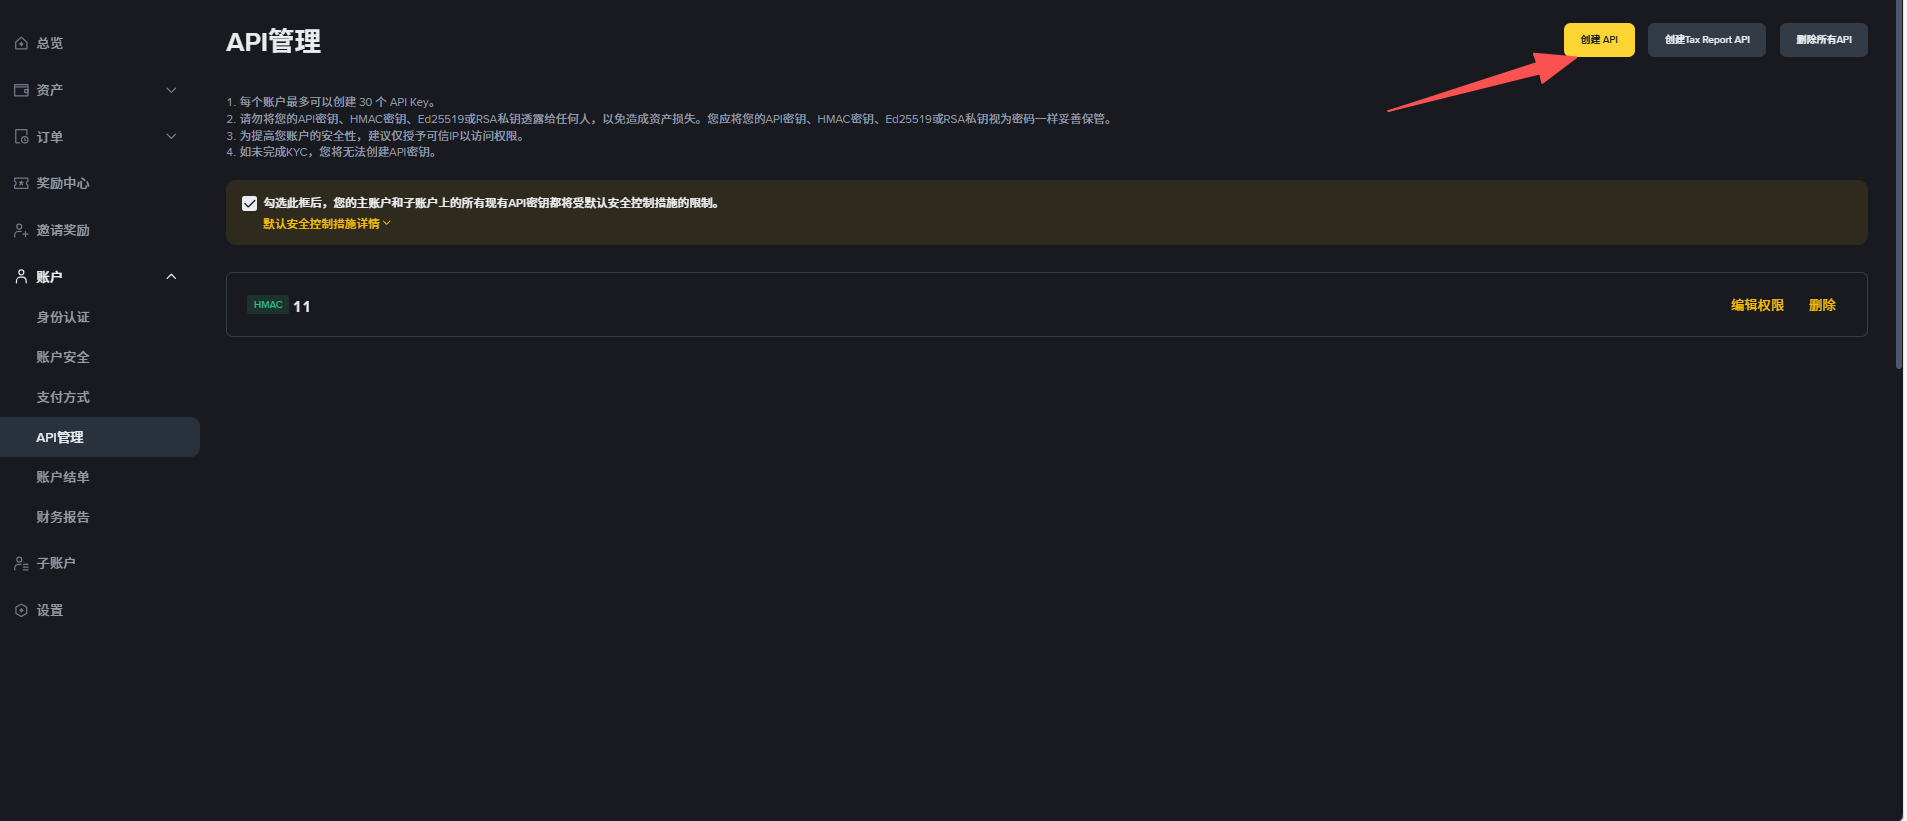
Select "System Generated" and give it a name. Complete security verification to create.
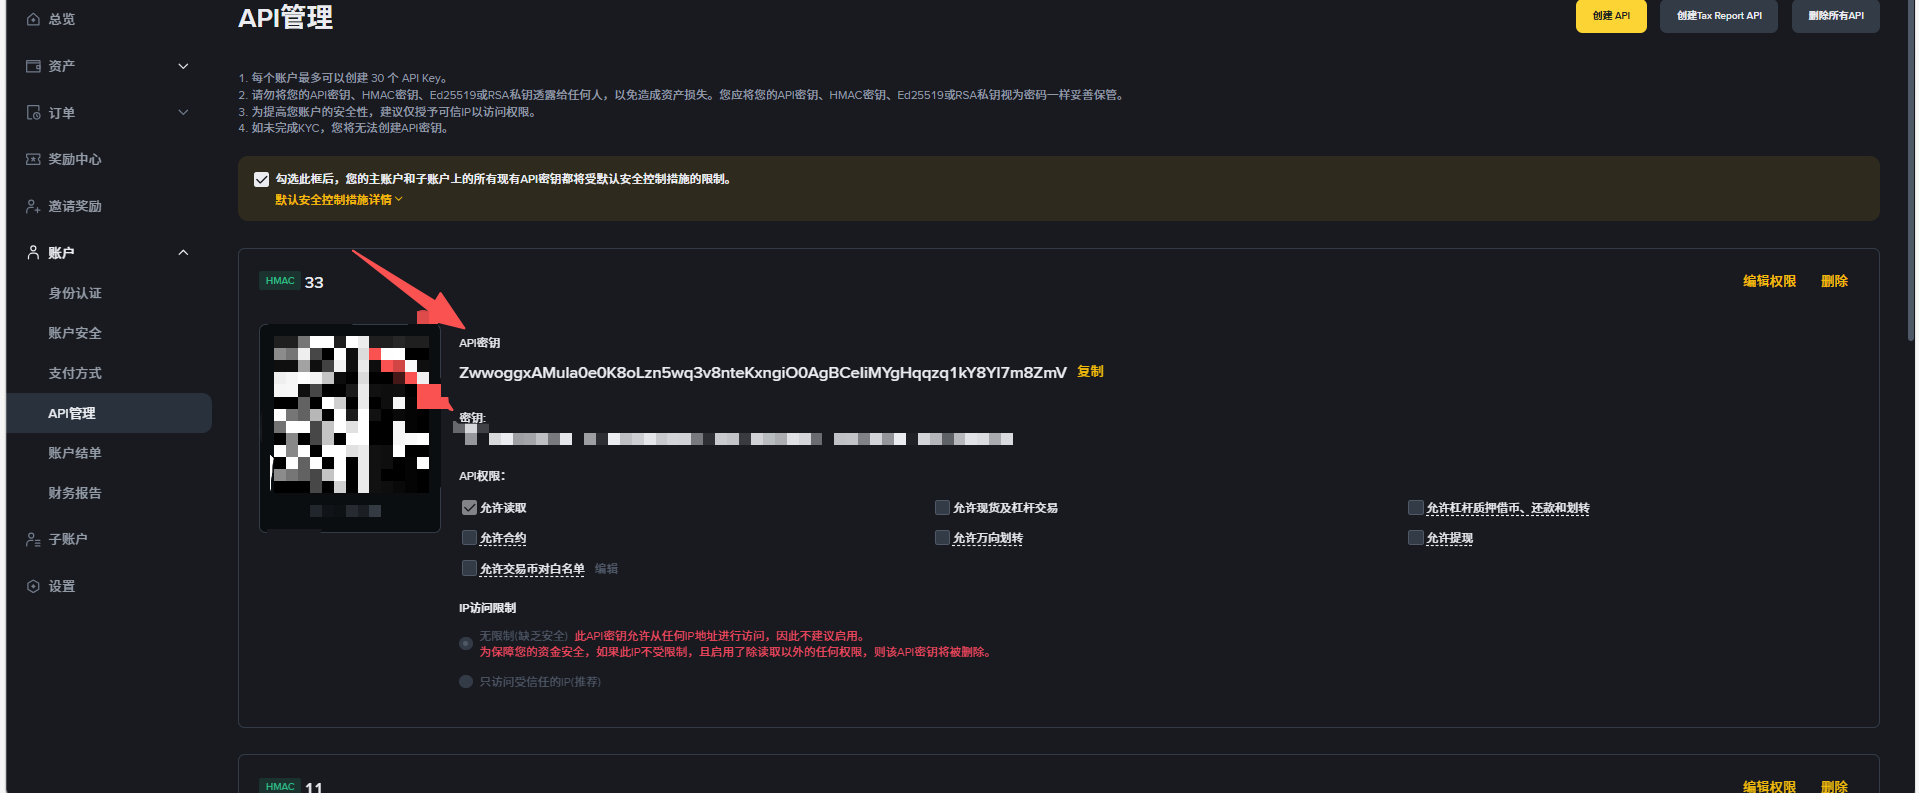
Step 2: Save API Key and Secret
Important
The Secret Key is only shown once at creation. Save both the API Key and Secret Key immediately.
Step 3: Configure IP Whitelist
Add your server's IP address to the whitelist.
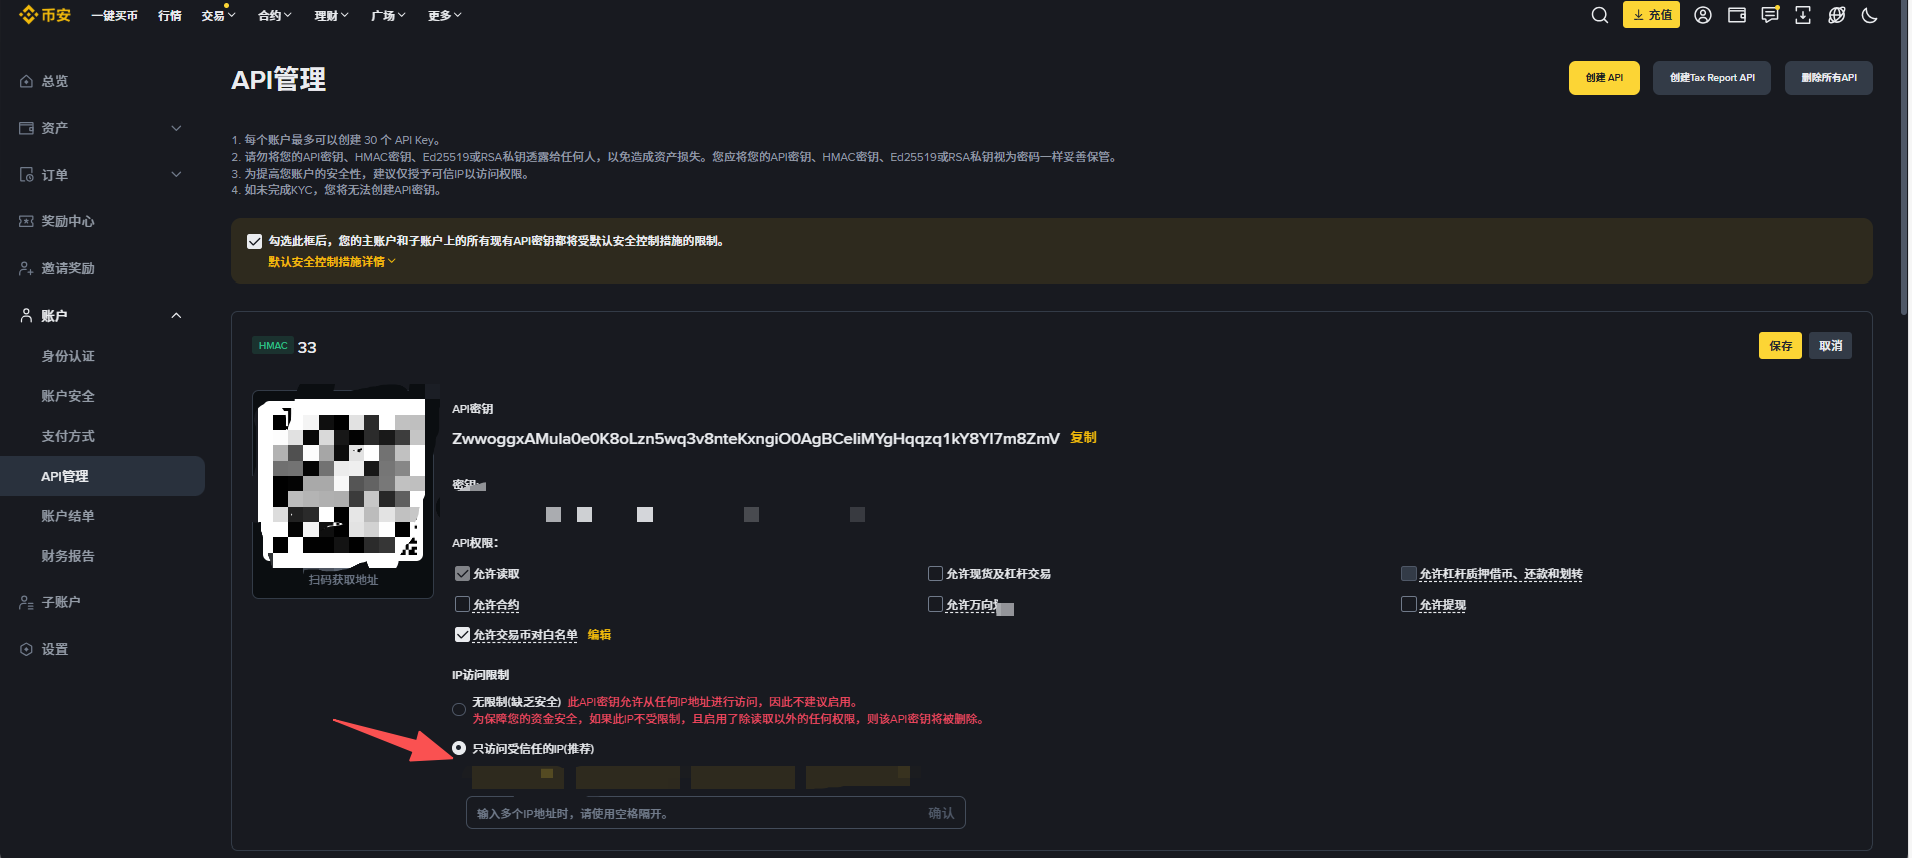
Step 4: Enable Permissions
Edit API permissions and enable the required permissions as shown:
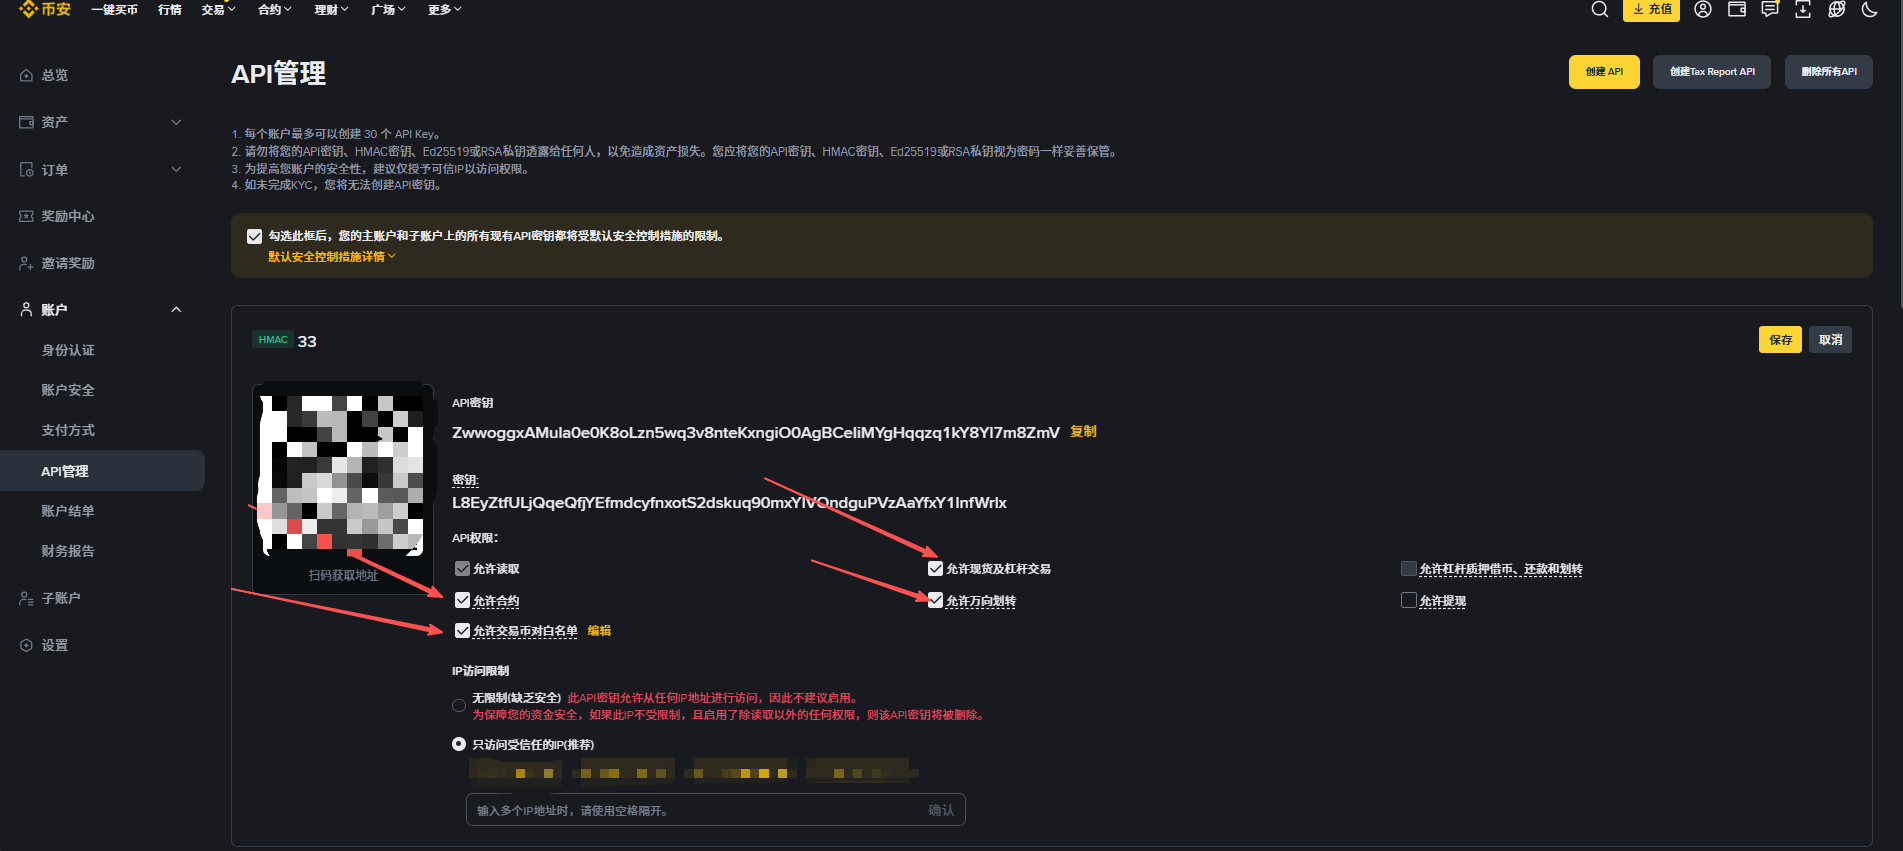
Can't enable Futures permission?
If the Futures permission checkbox is unavailable, you need to open a USDT-M Futures account first. See Step 5.
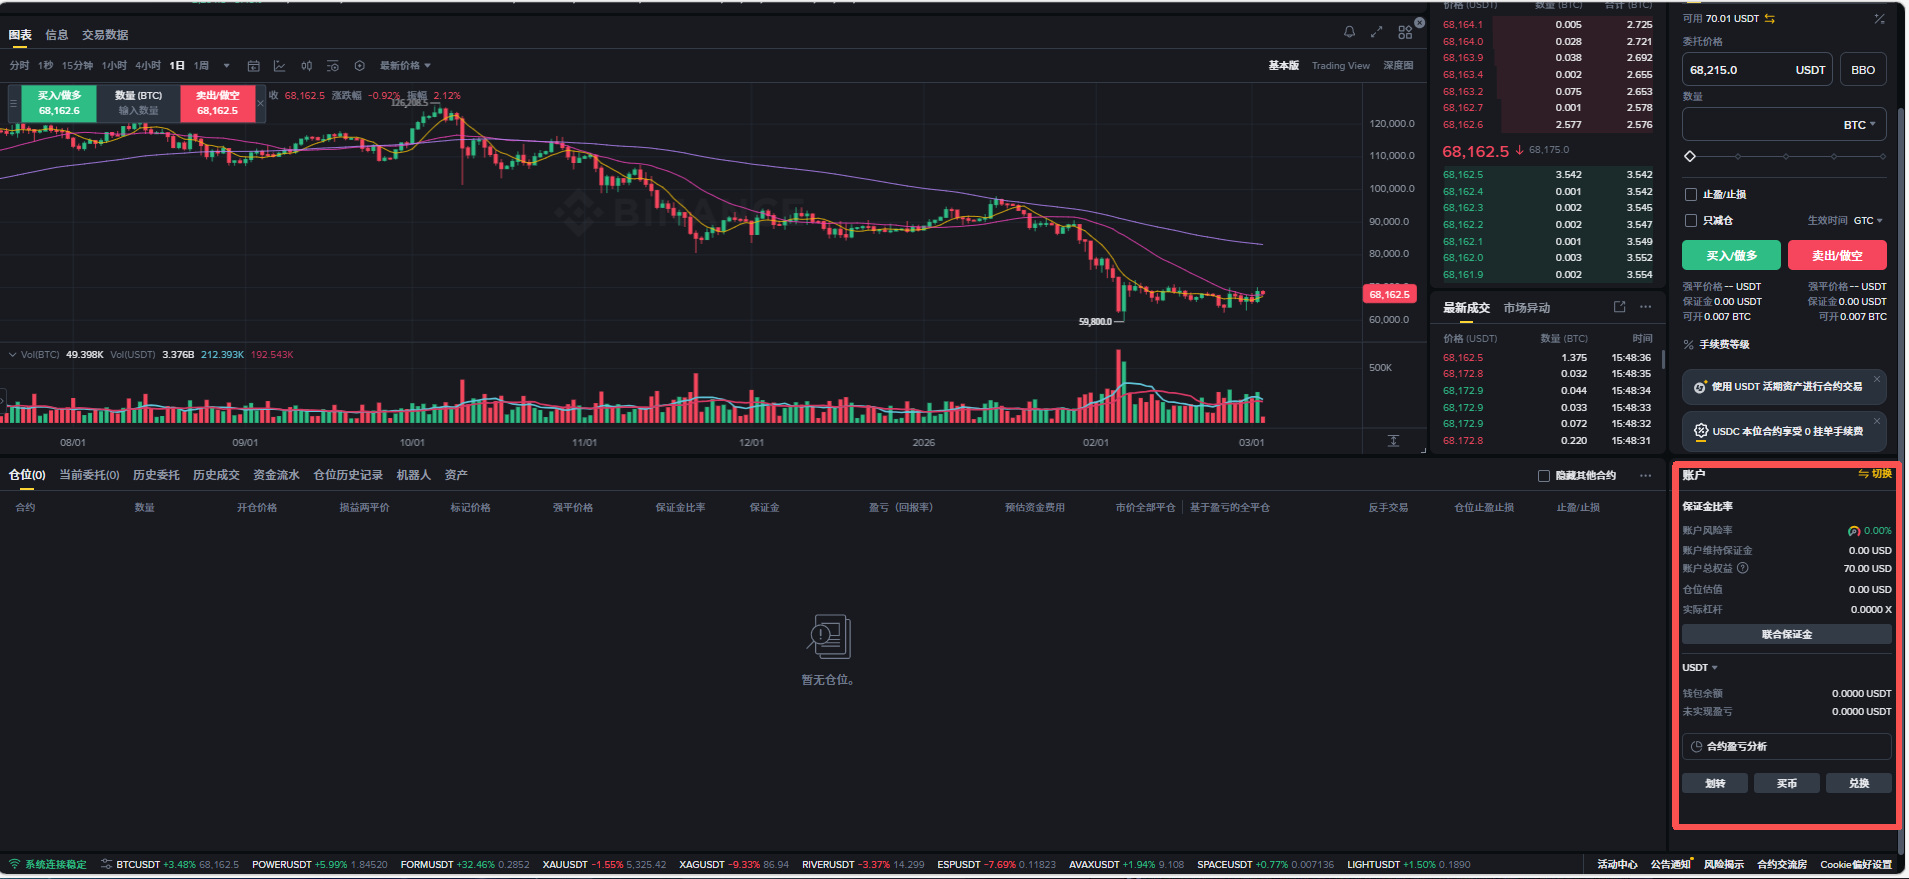
Step 5: Open USDT-M Futures (if not already)
Visit Binance Futures and find the option to open a USDT-M Futures account in the bottom right area.
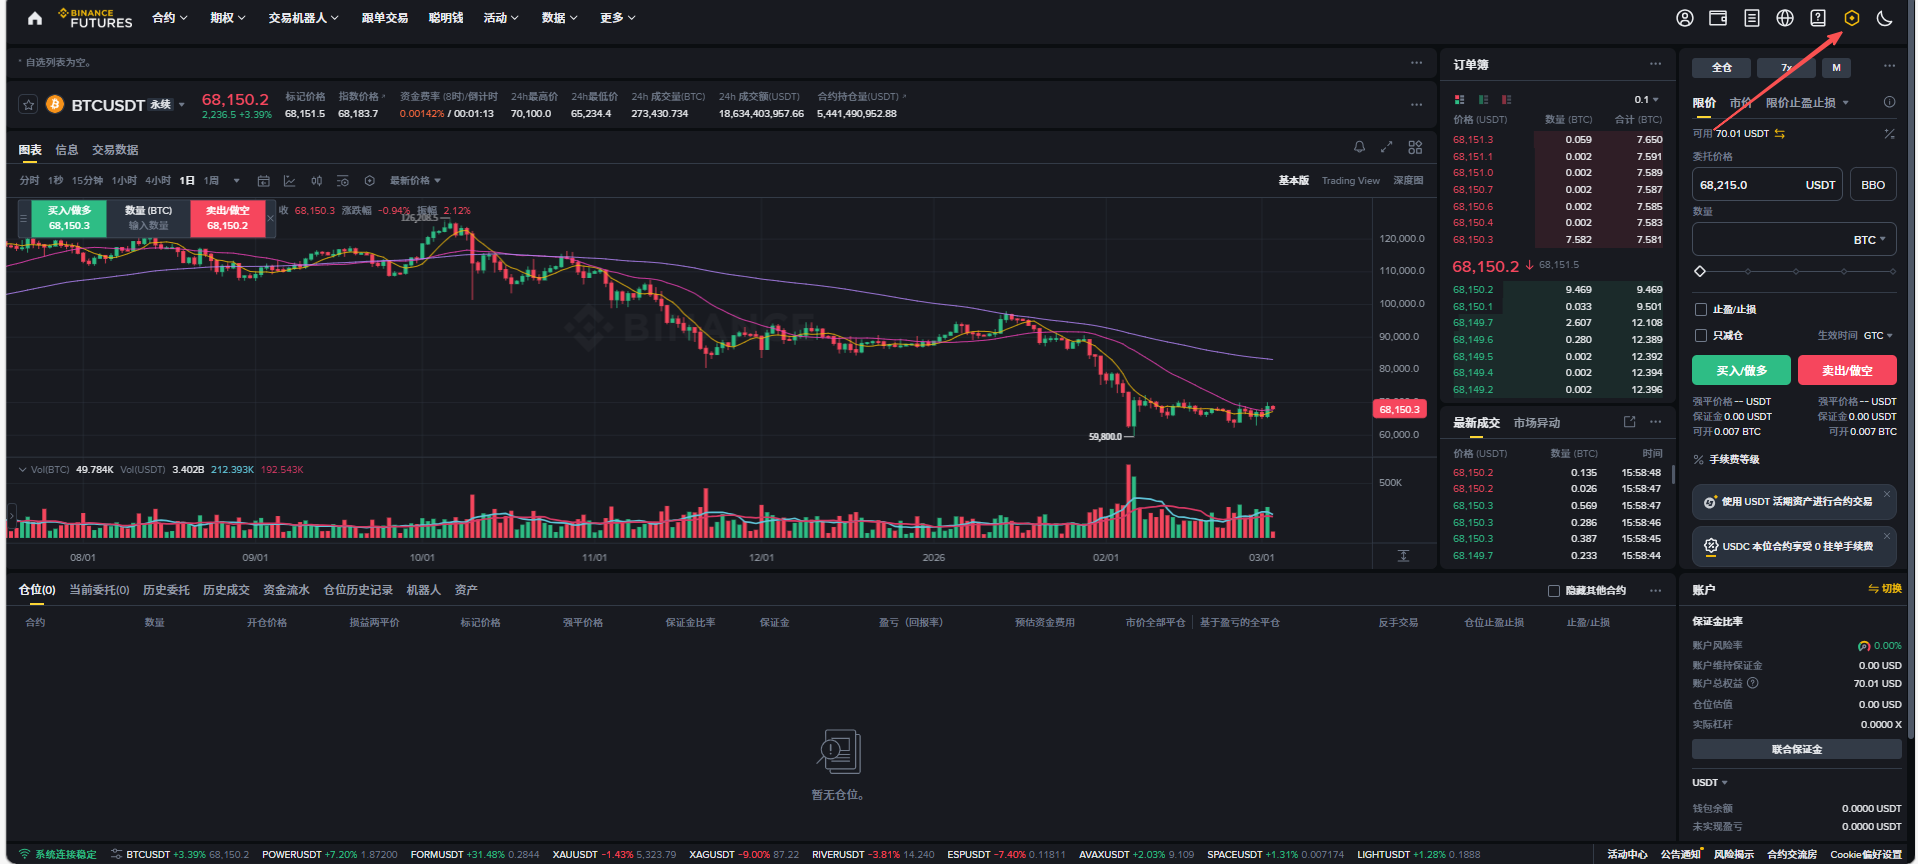
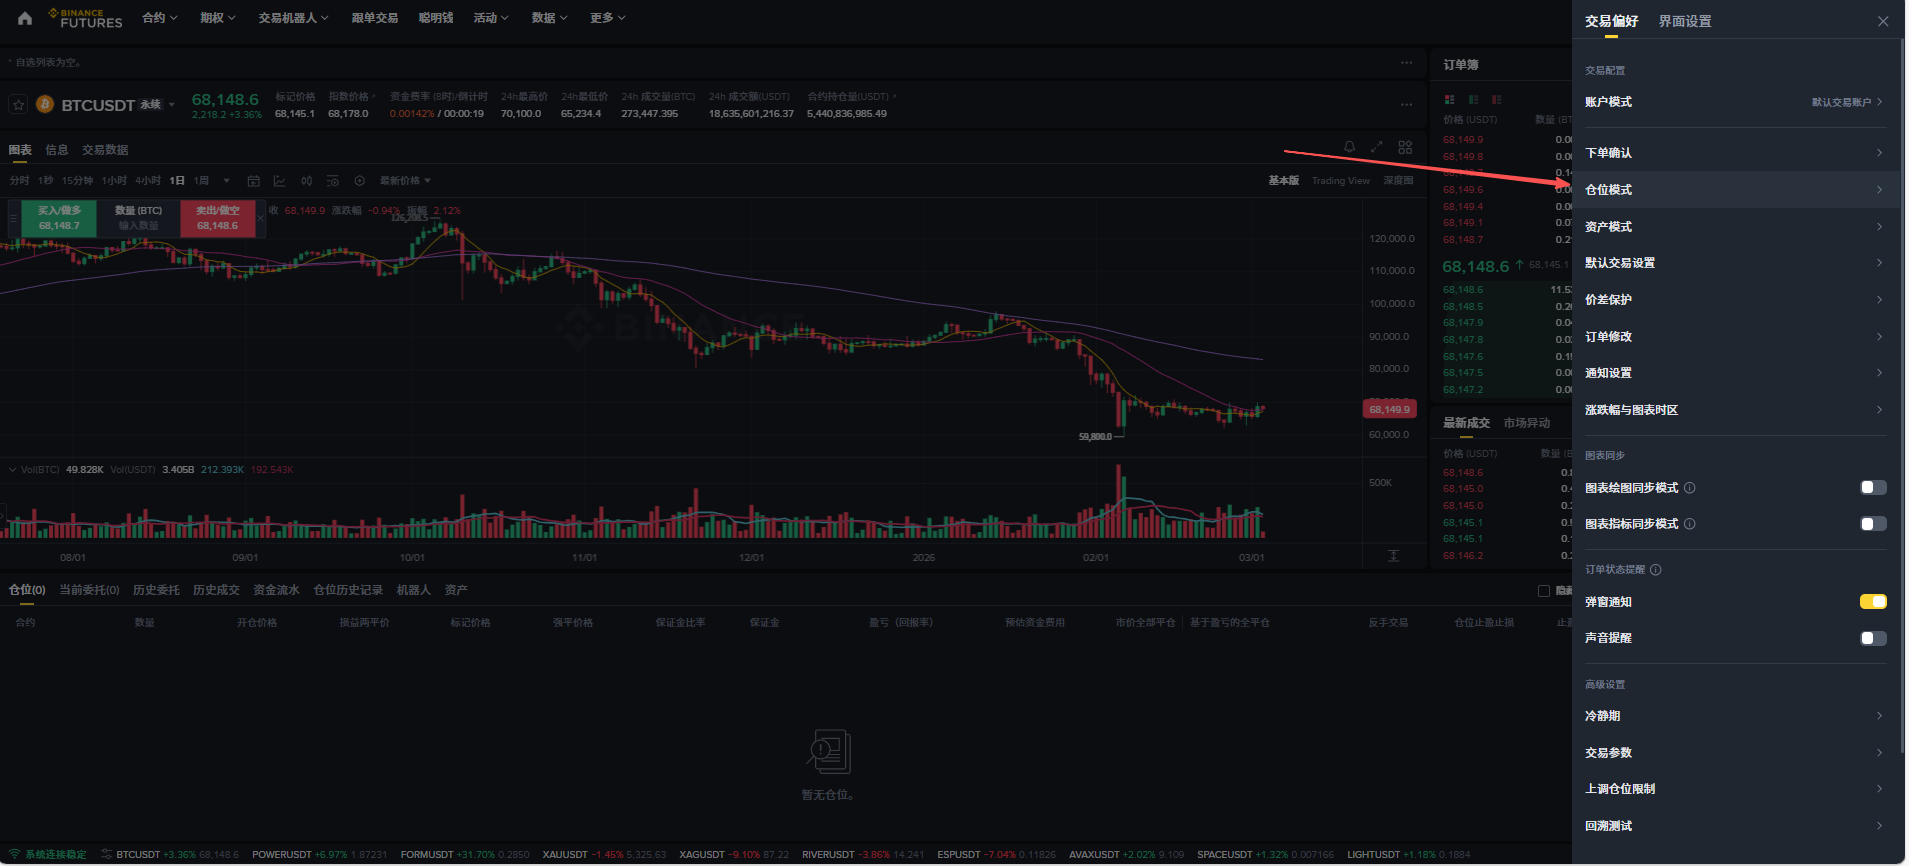
Step 6: Set One-Way Position Mode
After opening Futures, change the position mode to One-Way. Click the settings icon in the top right corner.
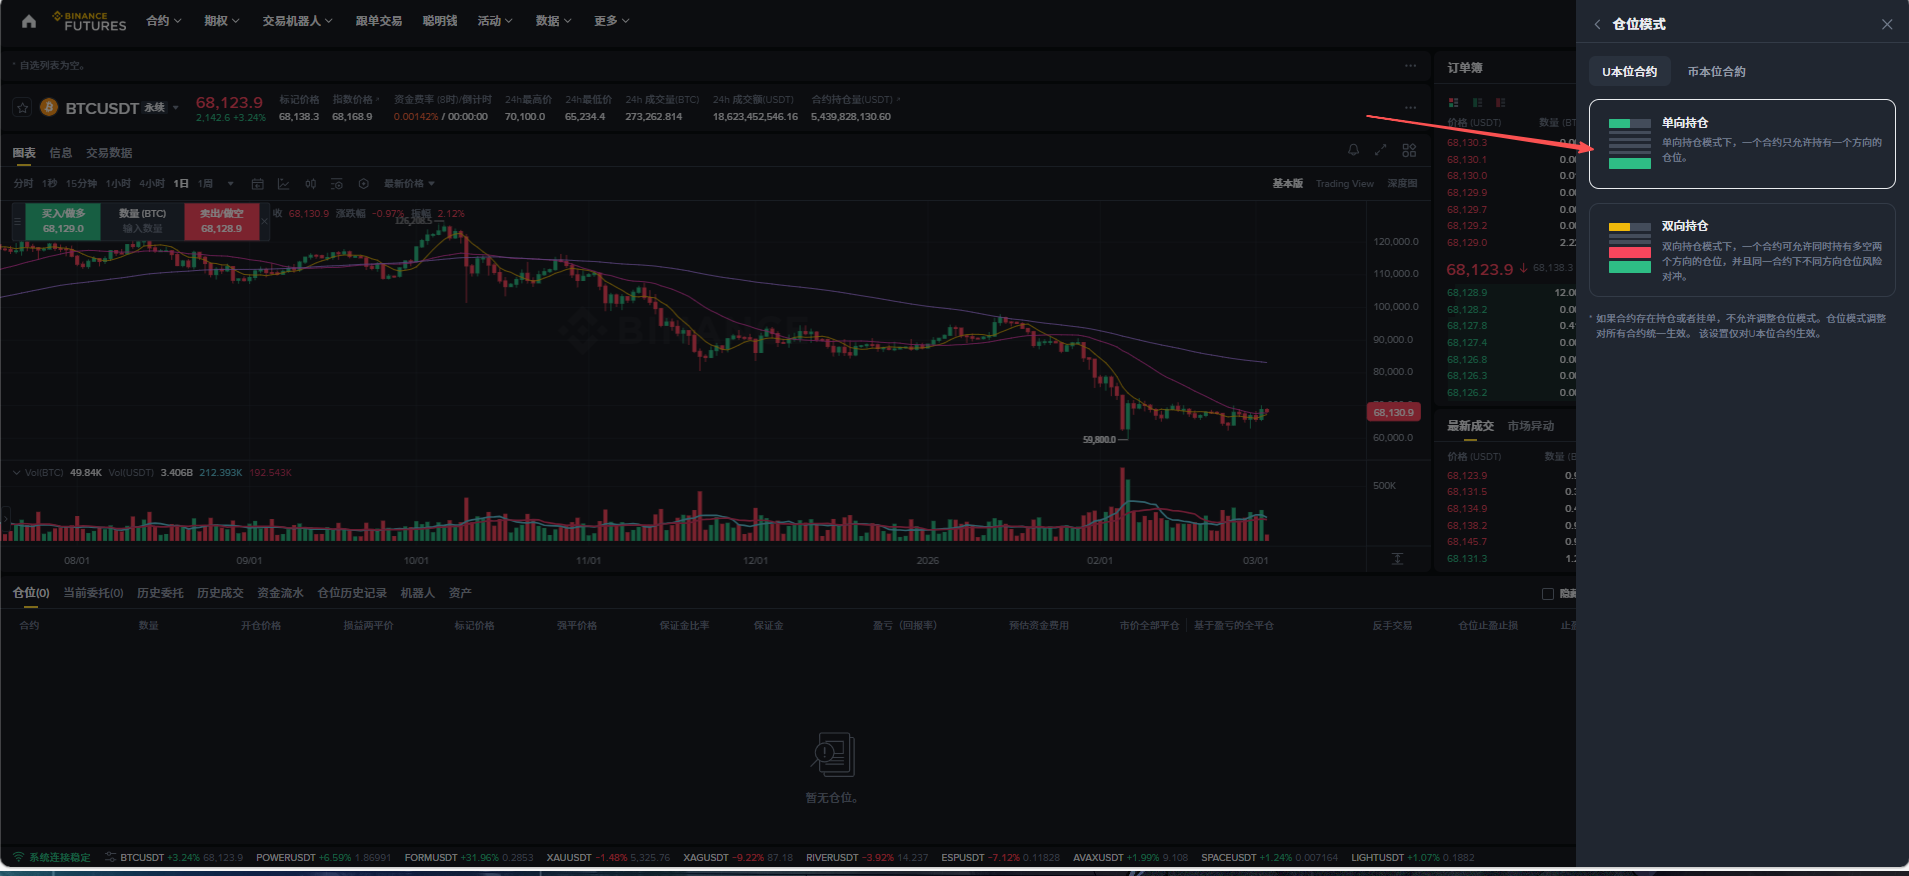
Select Position Mode:
Choose One-Way Mode:
Step 7: Connect in Hyper Alpha Arena
After completing the above steps, return to the API permissions page and save. Then connect your Binance account in Hyper Alpha Arena using the saved API Key and Secret Key.
Enabling Trading Strategy

After enabling the trading strategy, AI will start executing trading decisions based on prompts.
Important Note
Do not enable the strategy until you have completed the following configurations:
- AI Trader has been created and tested successfully
- Wallet has been connected
- Strategy prompts have been written and bound
- Trigger parameters have been configured
Next Steps
After completing AI Trader configuration, continue learning:
- Prompts & Strategies - Write trading strategies
- Signal Pools - Configure signal triggers